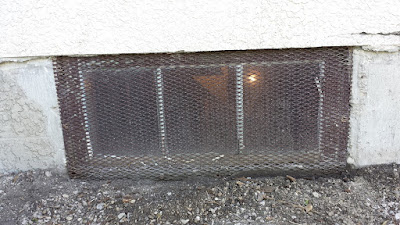
Okay, maybe not a dungeon, but definitely windowless!
My tiny little house,which I am certain is based on this Sears kit home, had such tiny windows in the basement foundation that only a 10 year old boy could fit through one. Plus the two that were in the rec room had steel mesh bolted on the outside to protect the glass from the gravel lane. That, of course, made it impossible to use them as an emergency exit! There is one other, in the laundry room, that the dryer vent and plumbing for the outside tap run through. Same size.
So. As I have been working in the basement, I have been formulating a plan on what to do with these things. One would have water dripping inside when it rained. The last thing I need is more leaking in the basement!!! (I fixed that already... and it still holding nicely, thankyouverymuch.)
The way these things were built is like this: single pane wooden framed window on the outside, set in a wooden frame that is set in the concrete foundation; dead space the thickness of the foundation (8" ~ completely lined with wood); second single pane wooden frame window inside on the rec room wall, but set back because the basement has been framed, insulated and drywalled.
Here in Central Canadia, in the Land of Ice and Snow (and cold, for a up to 6 months of the year), single panes of glass are as useless as putting a layer of plastic food wrap over the opening.
This is what has become of those useless things. Well, the two in the rec room, at least. I still have the laundry room one to do. I unbolted the metal screens from the windows. You can see that these things are literally at ground level. Which is idiotic. But it is what it is.
I have wood preservative rated for below grade wood that will be applied to these pieces of plywood (and the wooden frames) once I have them all in place. I was told I could put several coats on to make sure it soaks in well, and then once it is well dried, the plywood can be painted. I will get some light grey to match the concrete as best possible.
On the inside of this piece of plywood, I glued 1" thick rigid styrofoam insulation. I then caulked completely around the styrofoam to make sure it is well sealed. In the rec room where the inside window pane had been, I glued and screwed a piece of plywood and also glued styrofoam to the inside of this surface. That space between outside and inside windows is now a completely sealed unit.
The area between the former windows and the front edge of the wall framing will be filled with pink insulation, covered in plastic, and then drywalled over like it had never existed. I have lots of adjustable lighting in the rec room (part of the electrical upgrade that Old Fish and I did during the winter) so no worries about it being too dark. Those windows didn't really add any lights anyway!
I work this week and then have 2 weeks' staycation, during which I plan on finishing the windows completely, and the drywall in the basement, and build a couple of storage shelves under the stairs, and make a lattice cover for one side of the stairs where I have put the cats' litter box. The rec room side of the stairs will be drywalled. The other side is in the furnace room. I will make the cats a little opening ~ that the dog can't fit his head through ~ in the lattice. It will be on hinges so I can pull the box out to clean it.
I'll let you know how much I actually get done.


